
Move-Out Inspection: 3 Actions Both Tenants and Landlords Should Take

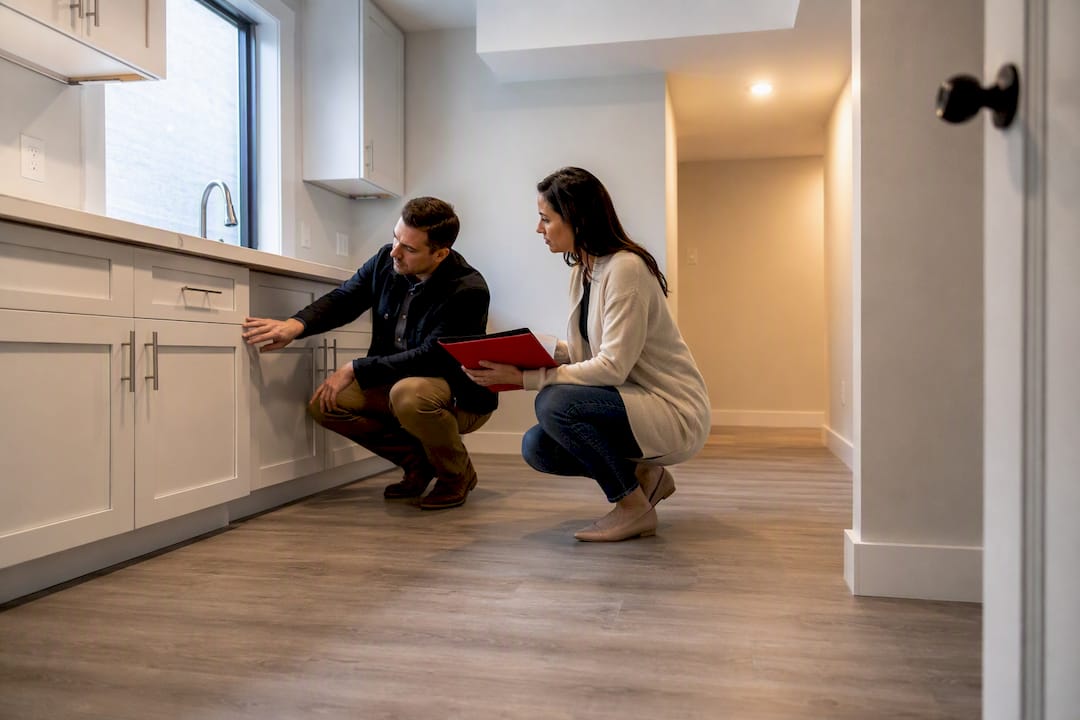
A move-out inspection is a documented walkthrough comparing your unit’s condition at vacancy to its condition at move-in, and it’s the single record landlords use to justify any deposit deduction. To protect your money, you need three things done right: document everything with photos, compare it side by side against your original move-in report, and either attend the inspection yourself or request a pre-move-out walkthrough in writing.
TL;DR:
Conduct a pre-move-out inspection 1 to 2 weeks before vacating to identify and address issues that could lead to deposit deductions.
Photograph each room from the same angles used during move-in, timestamp the images, and store them in a dated cloud folder as proof.
Use a signed checklist and comparison photos to strengthen your case in deposit disputes, and document all communication attempts with the landlord.
Know your state’s specific laws on deposit return timelines, which range from 14 to 21 days, and verify you receive detailed itemized deductions if applicable.
Landlords should base deductions solely on damage beyond normal wear-and-tear, with depreciation schedules reducing costs for aging fixtures or flooring.
Table of Contents
What Is a Move-Out Inspection and When Does It Happen?
A move-out inspection exists to answer one question: what changed in this unit since the tenant moved in, and who pays for it? The inspection is the legal basis for any deduction the landlord makes from the security deposit, and it also generates the punch list for getting the unit rent-ready for the next tenant.
Most leases distinguish between two separate events:
Pre-move-out inspection: Happens 1 to 2 weeks before the tenant leaves, gives the tenant a chance to fix issues before they become deductions, and is required by law in some states.
Final move-out walkthrough: Happens after the tenant has vacated and removed all belongings, and this is the inspection that actually determines deductions.
A pre-move-out inspection is a genuine second chance for tenants, since it flags problems while there’s still time to clean a carpet or patch drywall instead of losing that cost from the deposit.
Prepare: Timeline and Room-by-Room Move-Out Checklist
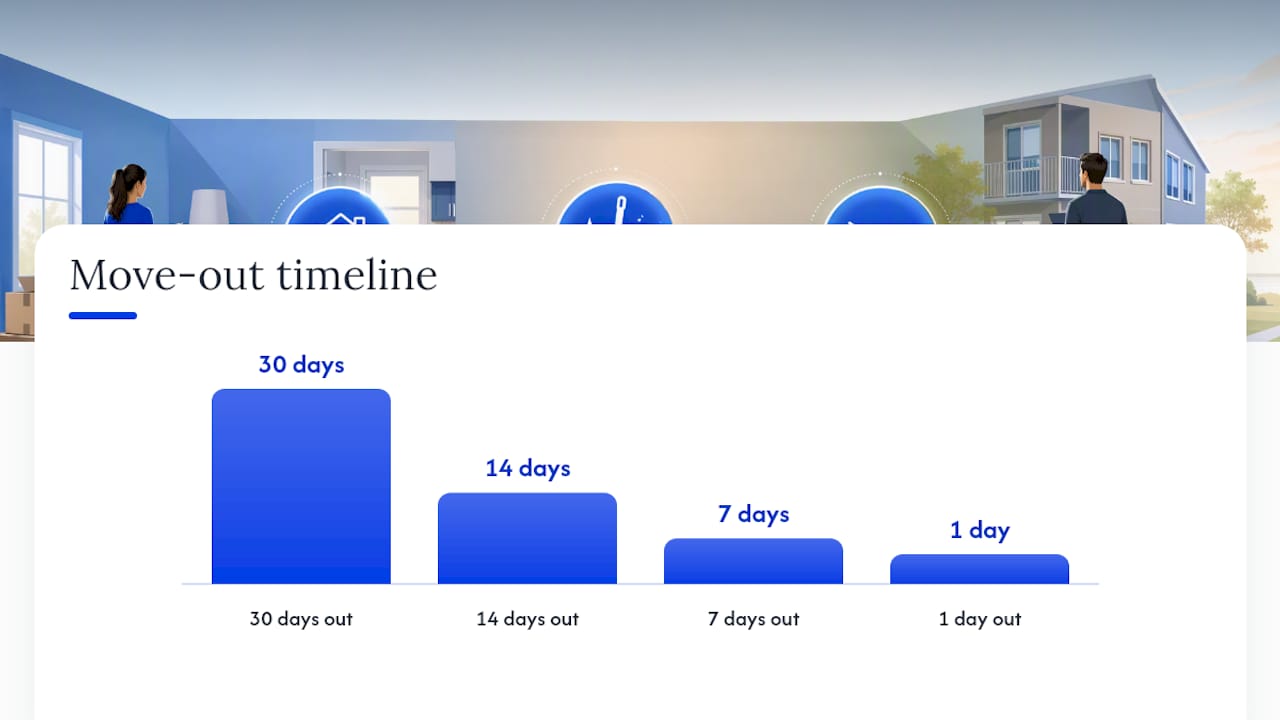
Fixing small problems early is cheaper than losing them from your deposit later. A structured timeline gives you enough runway to actually get the work done instead of scrambling the night before you hand over keys.
30 days out: Request a pre-move-out inspection in writing if your state allows it, order a professional carpet cleaning if needed, and start decluttering room by room.
14 days out: Schedule repairs for anything flagged in your pre-inspection, book movers, and confirm your forwarding address with the landlord in writing.
7 days out: Deep clean appliances, patch nail holes, replace burned-out bulbs, and photograph every room as you finish it.
1 day out: Do a final walkthrough alone first, confirm all utilities are scheduled for shutoff after your lease ends (not before), and gather every set of keys, fobs, and garage remotes.
Your room-by-room checklist should cover:
Kitchen: Clean inside the oven, refrigerator, and range hood; wipe down cabinets inside and out.
Bathrooms: Scrub grout, remove hair from drains, and check under-sink cabinets for leaks or mold.
Living areas and bedrooms: Fill nail holes with matching spackle, vacuum or shampoo carpets, and wipe down baseboards.
Appliances: Test that everything the landlord provided (dishwasher, washer/dryer, garbage disposal) still runs.
Exterior: Sweep patios or balconies, remove any personal items from shared spaces, and check for landscaping damage you caused.
Keys: Return every copy, including ones given to guests or dog walkers, since a missing key can trigger a rekeying charge.
Keep receipts for professional cleaning, carpet shampooing, or pest control. If a dispute arises later, a $150 receipt for carpet cleaning is worth far more than your word that “it was clean.”
Pro Tip: Photograph each room after cleaning but before you remove furniture, then take a second set once it’s empty. Landlords sometimes claim damage was hidden behind furniture, and the two photo sets close that argument before it starts.
How to Conduct the Move-Out Inspection
Bring the original move-in report to the walkthrough and go item by item. Without that baseline, an inspection turns into a subjective argument about what the unit “probably” looked like a year or two ago.
A thorough walkthrough of a one or two-bedroom unit typically takes 30 to 60 minutes, longer if there’s visible damage or a larger floor plan to cover.
Follow this sequence for a record that actually holds up:
Photograph each room from the same angles used in the move-in photos, so comparisons are direct instead of contextual.
Timestamp every photo (most phone cameras do this automatically) and back them up to a dated cloud folder the same day.
Note condition, estimated repair costs, and any items the tenant left behind directly on the inspection form.
Get a signature from the tenant if they attend; if they don’t, document the invitation attempt and mail a copy of the completed report.
A signed checklist paired with timestamped photos is consistently the strongest evidence in a deposit dispute, stronger than a landlord’s memory or a tenant’s assurance that “it was fine when I left.”
State Rules and Deposit Return Timelines
Deposit law is decided at the state level, and the deadlines vary enough that assuming your neighbor’s rules apply to you is a common, costly mistake.
California gives tenants the right to request a pre-move-out inspection, and landlords generally have a limited window after move-out to return the deposit or send an itemized deduction statement.
New York requires landlords to return the deposit or provide an itemized list within 14 days under the state’s Housing Stability and Tenant Protection Act.
Washington gives landlords roughly 21 days to return the deposit with an itemized statement of any deductions.
Texas and Florida set their own timelines and notice requirements, and both differ meaningfully from the states above.
These statutory windows dictate exactly when itemized deductions must be sent and when the remaining deposit is legally due back. Check your state housing authority’s website or your lease itself before assuming a national standard applies, because there isn’t one.
Wear-and-Tear vs. Tenant Damage: What’s Deductible
Landlords can only deduct for damage beyond normal wear-and-tear, and the line between the two trips up more disputes than any other issue in a move-out.
Normal wear-and-tear includes things like carpet fading from sunlight, minor scuffs on walls, and small nail holes from hanging pictures. Tenant damage includes large holes in drywall, pet urine stains soaked into carpet padding, cracked tile, or burns on countertops.
Age matters: a 10-year-old carpet nearing the end of its useful life can’t be charged to the tenant at full replacement cost, since it was due for replacement anyway.
Depreciation schedules, often referenced from HUD guidance, reduce how much a landlord can legitimately deduct for aging fixtures and flooring.
Borderline items (a single deep scratch, a stained but not ruined countertop) are worth photographing from multiple angles and documenting with a repair quote, not just a flat estimate.
How to Dispute Deductions and Recover Your Deposit
If you disagree with an itemized deductions letter, act quickly and in writing. Most disputes are won or lost on paperwork, not persuasion.
Request the itemized list and receipts immediately if the landlord hasn’t already provided them.
Pull your move-in report and photos and compare them line by line against each claimed deduction.
Send a written dispute letter by certified mail, referencing specific items and attaching your own photo evidence.
File in small claims court if the landlord doesn’t respond or refuses a reasonable resolution, since many states cap this at a level that doesn’t require a lawyer.
Pro Tip: Landlords in states like California and Texas can face statutory penalties for wrongfully withholding a deposit, so a well-documented dispute letter often prompts a faster settlement than a lawsuit ever would.
What Property Managers Do Differently
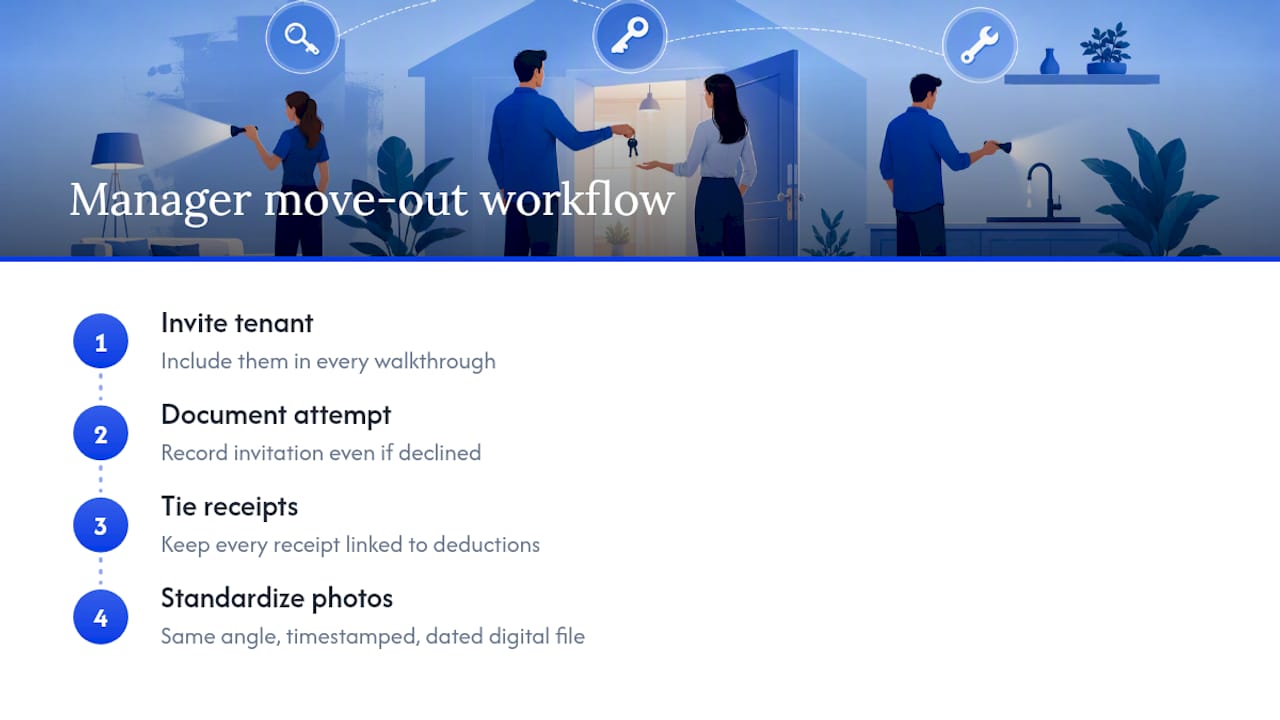
Professional managers treat move-in documentation as the foundation everything else rests on. Without a baseline report, every later inspection is just an opinion. The workflow that actually reduces disputes is simple: invite the tenant to every walkthrough, document the attempt even when they decline, and keep every receipt tied to a deduction. Photos get taken from the same angle every time, timestamped, and filed in a dated digital record rather than a phone’s camera roll.
Publisher Perspective: How We Approach Move-Out Inspections
Our inspection workflow starts with the move-in report, not the move-out one. Every unit we manage gets a documented baseline, a scheduled pre-move-out invitation, and a dated photo file that survives a dispute months later. That system is what actually shortens turnover time and keeps deposit disputes rare instead of routine.
— Main
Turn Move-Out Inspections Into a Repeatable System
2ndstreetpropertymanagement is the alternative to handling turnovers solo. Instead of chasing down move-in photos from a folder you can’t find, you get a documented inspection workflow, dispute-ready records, and a faster path from vacancy to rent-ready.

Landlords who manage inspections themselves often lose deposit disputes simply because the move-in baseline was never properly filed. Our process closes that gap: every unit gets a signed checklist, timestamped photos, and receipts tied to every deduction, built on the same tenant screening and maintenance documentation standards we use across our portfolio. That paper trail also plugs the insurance gaps that catch landlords off guard when pre-existing damage gets misattributed to a departing tenant.
If you’re managing rentals in Southern New Jersey and want inspections handled without the guesswork, reach out to 2ndstreetpropertymanagement to see how our turnover process works for your properties.
Sources
Move-Out Inspection Checklist: Room-by-Room Guide for Property Managers 2026 | Dropcurb
Free Move-Out Checklist 2026: Protect Your Security Deposit (Room by Room) | Security Deposit Laws
Free Move-Out Inspection Checklist – Fillable Online Form | Instant PDF Generation
Move-Out Inspection Basics for Landlords and Tenants | Avail
Recommended
Comments