
48–72 Hour NSPIRE Ready HQS Checklist for U.S. Landlords


Passing an HQS or NSPIRE inspection comes down to fixing the same dozen items that fail units nationwide: working smoke and carbon monoxide alarms, functioning heat, no active leaks, and windows and doors that open, close, and lock properly. Walk the unit yourself 48 to 72 hours before the inspector does, with utilities on and every room accessible. Fix what you find, and you’ll cut your reinspection risk and avoid the subsidy delays that come with a failed unit.
TL;DR:
Properly testing all utilities, installing and maintaining functioning smoke and CO alarms, and fixing active leaks are critical to avoid instant failure during inspection.
Address structural issues like foundation cracks, roof damage, and wall shifts before inspection day, and document all repairs for clarity.
Keeping units clean and free of trash and mold, especially around plumbing and ventilation, directly reduces common failure reasons.
Confirm which inspection standard (HQS or NSPIRE) applies before prepping, and perform a self-check quarterly to catch issues early.
Outsourcing inspection prep and repair management to specialized landlords reduces failed inspections and prevents subsidy payment delays.
Table of Contents
Quick Pre-Inspection Checklist for an HQS Inspection
Before you touch paint colors or curtains, triage the unit against the items that actually fail inspections. This is the fastest version of the hqs inspection checklist you’ll use on every turnover.
Smoke alarms on every level and CO alarms where required
Working heat that reaches every habitable room
Hot water at the tap
Electricity on and functioning at every outlet
GFCI protection in kitchens, bathrooms, and other wet locations
All stove burners and the oven light and ignite properly
Windows and doors seal, lock, and open without force
No active plumbing leaks anywhere in the unit
Handrails secured on any stairway with four or more steps
Outlet and switch plates covered, no exposed wiring
Clear, unobstructed egress paths from every room
No visible signs of rodent or insect infestation
According to HUD’s NSPIRE standards, deficiencies get sorted into four severity tiers: life-threatening, severe, moderate, and low. A dead smoke alarm or an exposed live wire lands in the life-threatening bucket, and those typically require correction within 24 hours of notice. Everything else usually gets a standard repair window, often 30 days.
Pro Tip: Turn every utility on yourself and confirm it works before the inspector’s visit. An inspector who can’t test the stove or run the water because gas or electric is off will often fail the unit on the spot, regardless of its actual condition.
Room-by-Room HQS and NSPIRE Checklist
HUD’s own inspection tool, form HUD-52580, walks room by room through pass/fail criteria, and that structure is worth mirroring in your own prep.
Living room and general living areas
Two working outlets, or one outlet plus a permanently fixed light fixture
No exposed wiring, frayed cords, or overloaded power strips
Windows that open, lock, and hold themselves open without props
Ceilings, walls, and floors free of holes, major cracks, or water staining
Kitchen
Stove or range with all burners igniting and the oven reaching temperature
Sink with hot and cold running water and a drain that clears without backing up
Garbage disposal flange intact if a disposal is installed
Adequate space for food storage and preparation
Refrigerator present and cooling, if the unit is provided by the landlord
Bathroom
Toilet that flushes completely and refills without running continuously
Fixed wash basin with working hot and cold water
Tub or shower that drains and holds water without leaking through the floor below
Working ventilation, either a window or an exhaust fan, to control moisture
Bedrooms
A second means of egress (a window that opens fully or a door to the outside)
A smoke alarm inside or immediately outside each sleeping room
Closet doors, where present, opening and closing on their tracks
Basements, utility rooms, and common areas
Electrical panels covered and accessible, no exposed breakers
No standing water, mold growth, or evidence of pest activity
Shared hallways and stairwells free of stored items blocking egress
Utilities, Mechanical Systems, and Exterior Checks
Room-by-room checks catch a lot, but plenty of failures come from systems that serve the whole unit rather than one space.
Permanent heating source that reaches every habitable room, with fuel-burning units properly vented to the outside
Hot water present at every fixture, at a safe, non-scalding temperature
Water heater with an intact temperature and pressure relief (TPR) valve and discharge pipe running toward the floor
No active leaks anywhere in the supply or drain lines, and toilets bolted securely to the floor
Weather-tight exterior doors and windows with intact locks and no gaps letting in outside air
Sound roof and gutters, with no active leaks or missing sections visible from the ground
Walkways free of major cracks, ice buildup, or trip hazards, and handrails secured on any exterior steps
Pro Tip: Walk the exterior at night before the inspection. Broken exterior lighting and trip hazards you’d never notice in daylight are exactly what an inspector, and a tenant, will trip over after dark.
Smoke Alarms, Carbon Monoxide Alarms, and Electrical Hazards
Life-safety items generate a disproportionate share of failed inspections, largely because they’re cheap to fix and easy to overlook.
Install smoke alarms on every level of the unit and inside or directly outside each sleeping room
Install CO alarms outside sleeping areas whenever the unit has a fuel-burning appliance or an attached garage
Replace any alarm past its manufacturer expiration date, usually printed on the back of the unit
Push the test button on every alarm and confirm the tone is audible from inside each bedroom with the door closed
Swap batteries on a fixed schedule rather than waiting for the low-battery chirp
Treat exposed wiring, missing outlet covers, or a double-tapped breaker as an automatic fail and call a licensed electrician rather than attempting a fix yourself
NSPIRE standards treat a dead smoke alarm as a life-threatening deficiency, which routinely triggers a 24-hour correction window instead of a standard repair timeline.
Lead Paint Rules and the Shift to NSPIRE
If your unit was built before January 1, 1978, deteriorated paint is one of the most common inspection findings, and inspectors will flag chipping, peeling, or flaking paint on any interior or exterior surface. The GAO’s review of lead paint hazards in HUD programs confirms this remains a persistent issue across older housing stock nationwide. If you already hold certified lead-free documentation for the property, hand a copy to your public housing authority (PHA) before the inspection date, since it can resolve visual assessment questions before they become a finding. For any paint work you do perform, the EPA’s lead guidance covers safe testing and renovation practices, and hiring an EPA-certified renovator is worth the cost on pre-1978 properties.
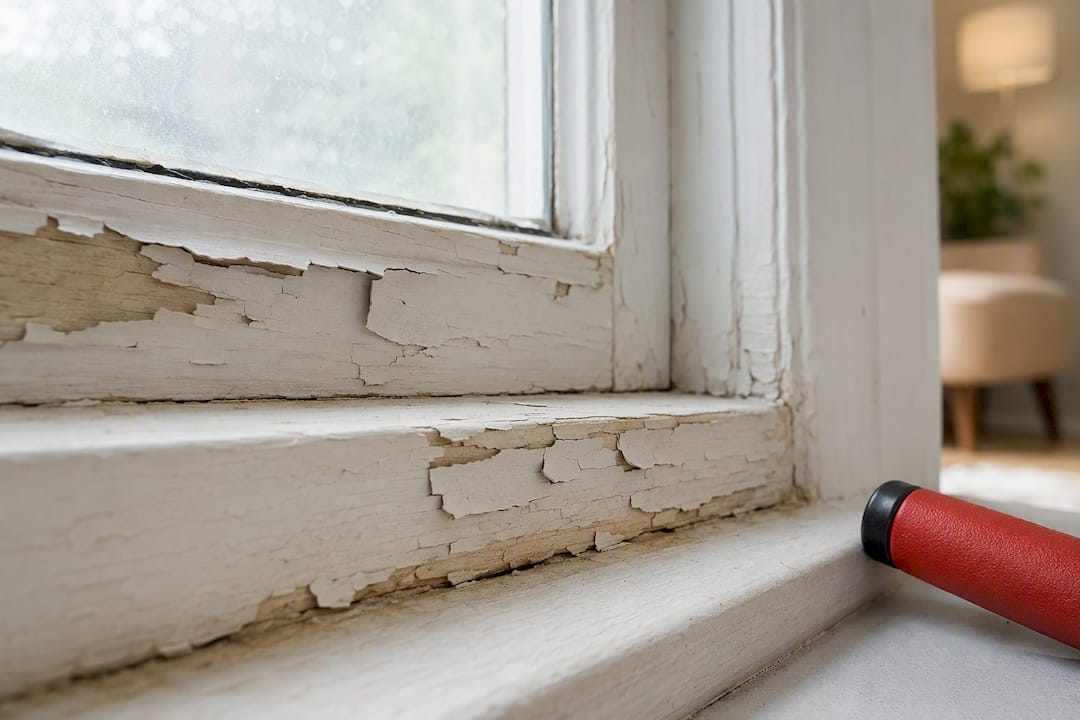
HUD has also been moving PHAs from legacy HQS toward its newer NSPIRE standard, and not every housing authority has switched over on the same timeline. Call your local PHA before inspection day and confirm which standard, and which checklist, they’re actually using.
How to Prep a Unit in 48 to 72 Hours
Schedule tenant access and confirm the exact inspection window
Turn on all utilities: gas, electric, and water, at least a day ahead
Run the full room-by-room checklist yourself and note every failure point
Replace burned-out bulbs, dead batteries, and any expired alarms
Clear stairwells, hallways, and egress paths of stored items
Confirm the tenant will be home or has granted access if required
Gather your paperwork alongside the physical prep: repair receipts, contractor invoices, lead-free certification if you have it, and the prior inspection report with notes on what you already fixed. Keep proof utilities were on, like a photo of a lit stove burner, in case a PHA disputes a “utilities off” finding later.
Pro Tip: If a unit fails, ask your PHA directly for its reinspection scheduling window and whether the household’s subsidy payment will be paused. That single phone call, as Philadelphia’s PHA guidance notes, resolves more landlord confusion than anything printed on the failure notice itself.
How Investor-Focused Property Managers Keep Units Ready
Property managers built around investor economics don’t treat inspections as an annual scramble. Routine preventive maintenance visits and a standing tenant-notice workflow catch a dead alarm or a slow leak months before a PHA ever schedules a visit. For a deeper, room-by-room operational playbook built specifically around Section 8 compliance, the Section 8 landlord field manual and the ultimate rental property checklist both go further than any single pre-inspection walkthrough can.
Inspection Timing, Types, and PHA Notification
HQS and NSPIRE inspections happen on three separate timelines, and each one carries different notice requirements. The initial inspection happens before a new tenant moves in, and a unit cannot receive subsidy payment until it passes. Periodic inspections follow on an annual or biennial cycle depending on the PHA, and they’re typically scheduled with advance written notice so the landlord and tenant both know the date. Special or reinspections get triggered by a tenant complaint, a failed periodic inspection, or a follow-up visit confirming a repair actually happened.
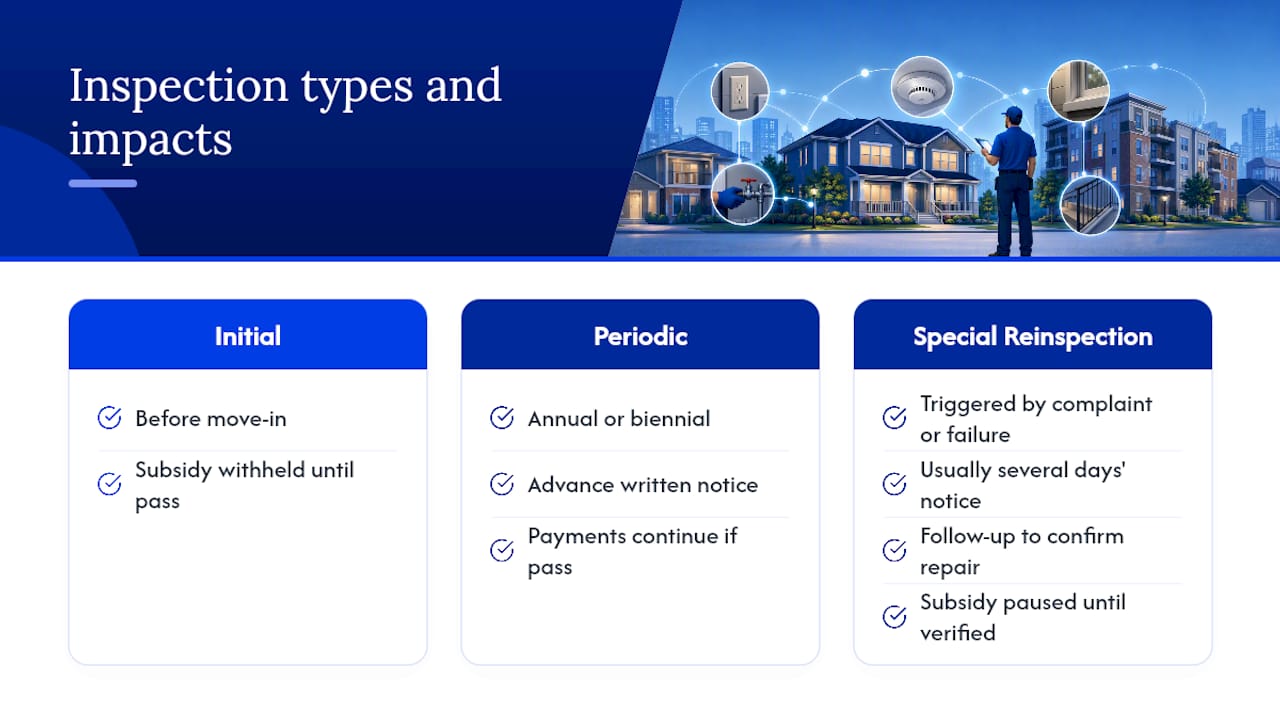
According to NYC HPD’s inspection guidance, inspections occur before move-in and periodically afterward, and a failed unit requires the landlord to grant repair access. Subsidy payments can be suspended until the PHA verifies the fix. That suspension is the real cost of a failed inspection, not the repair itself, since most fixes are inexpensive compared to weeks of paused rent payments.
Notification usually arrives by mail or through the PHA’s online portal, and most agencies give landlords and tenants at least several days’ notice for periodic and special inspections. Contact your PHA directly if you’re unsure which inspection type is coming or whether a prior repair still needs a follow-up visit; agencies vary in how they track and close out reinspection items, and assuming a fix was logged without confirmation is a common way landlords get caught off guard.
Checking Structural Integrity: Foundation, Roof, and Walls
Structural findings don’t show up as often as a dead alarm or a clogged drain, but they carry real weight when an inspector spots them. Foundation issues worth checking before inspection day include visible cracking wider than a hairline, noticeable settling that’s pulled a door or window frame out of square, and any water intrusion where the foundation meets the ground.
Roof condition matters both from the ground and, when accessible, from inside the attic or top-floor ceiling. Missing shingles, sagging rooflines, and water stains on interior ceilings all point to a roof problem an inspector will document, whether or not it’s actively leaking the day they show up.
Walls get checked for structural cracking, not cosmetic wear. A long diagonal crack running from a doorframe or window corner suggests movement worth having a contractor look at, while small surface cracks from normal settling generally don’t. Walk every wall in the unit and note anything that looks like it’s widened or shifted since your last visit, since that kind of change is exactly what an inspector is trained to flag.
Fix visible structural issues before inspection day when you can, and document anything you’ve already addressed with contractor invoices. Documenting ongoing or planned structural repairs can help clarify a unit’s condition to the PHA inspectors and may prevent misunderstandings about unaddressed problems.
Cleanliness and Sanitation Standards Inspectors Check
Sanitation findings are some of the easiest to fix and some of the most avoidable, which makes them frustrating when they show up on a failure notice. Inspectors look for accumulated trash, either inside the unit or in shared exterior areas, and expect regular trash removal with covered containers where required.
Kitchens and bathrooms get closer scrutiny for standing food waste, grease buildup around cooking surfaces, and general grime that suggests deferred cleaning rather than active use. None of this is subjective the way it sounds. Inspectors are trained to distinguish normal wear from neglect, and a unit that’s simply lived in passes fine.
Common areas in multi-unit buildings, like shared hallways, entryways, and laundry rooms, need the same standard applied consistently. A single unkempt common space can affect how an inspector views the entire property, even when individual units are clean.
Before inspection day, do a full walk-through with cleanliness specifically in mind, separate from your repair checklist. Ask tenants to handle routine cleaning of their own space ahead of the visit, since a landlord showing up with a crew the morning of the inspection is a visible, and avoidable, red flag.
Mold, Asbestos, and Other Hazards Beyond Lead Paint
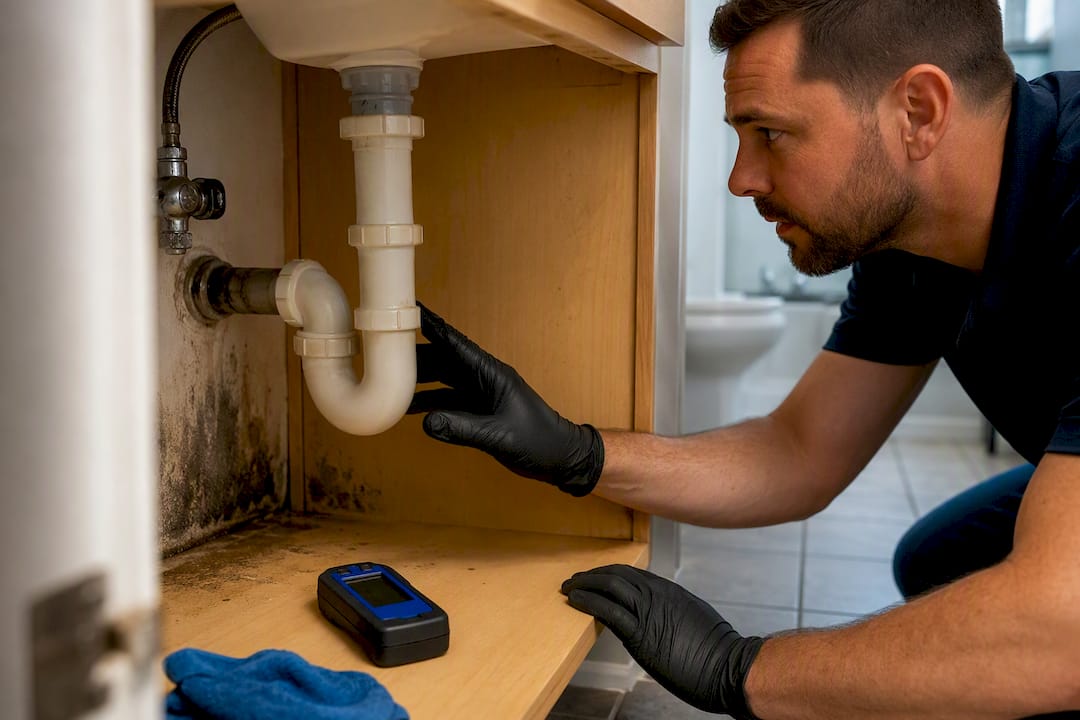
Lead paint gets the most attention in pre-1978 units, but mold and asbestos cause their own share of findings and carry their own health risks for tenants. Mold shows up most often around plumbing leaks, poorly ventilated bathrooms, and basements with moisture problems, and it’s almost always a downstream symptom of a leak or ventilation issue you should be fixing anyway.
Treat visible mold as a signal to find and fix the moisture source first, then remediate the growth itself. Painting over mold without addressing the underlying leak is a temporary cover that will resurface, often worse, at the next inspection cycle.
Asbestos is a different kind of risk, since it’s usually hidden inside older building materials like floor tile, pipe insulation, and popcorn ceiling texture rather than visible on a surface. It’s generally safe left undisturbed, but it becomes hazardous during renovation or demolition work that disturbs those materials. If you’re planning any renovation on a property old enough to potentially contain asbestos, have it tested before work begins rather than after a worker or tenant reports symptoms.
Neither hazard is something a landlord should attempt to test or remediate without proper training, and both are worth budgeting for as part of routine maintenance on older housing stock rather than treating as a surprise expense.
Documentation and Reporting After the Inspection
What happens after the inspector leaves matters as much as the walkthrough itself. You’ll typically receive a written report listing every deficiency found, sorted by severity, along with a correction deadline for each item. Life-threatening findings usually carry a 24-hour window; everything else generally falls into a standard 30-day repair period, though PHAs vary in how strictly they enforce that timeline.
Document every repair as you complete it. Photograph the fixed item, save contractor invoices, and keep a written log with dates, since PHAs frequently require proof of correction before scheduling a reinspection or reinstating a paused subsidy payment. A folder with before-and-after photos and receipts, organized by unit, saves real time when a PHA asks for verification months later and you can’t recall exactly what was fixed when.
Once repairs are done, contact your PHA to request the reinspection rather than waiting for them to follow up. Some agencies will close out a straightforward fix based on submitted photo evidence alone, while others require a physical revisit. Ask which process applies to your case, and keep every piece of correspondence with the PHA in writing rather than relying on a phone call you can’t produce later if a dispute comes up.
What the HQS Checklist Debate Gets Wrong
Most advice on passing an HQS or NSPIRE inspection still treats it like a one-time exam to cram for, and that’s backward. HUD’s own framing of NSPIRE pushes toward year-round, proactive maintenance rather than a scramble the week before an inspector shows up, and the data backs that instinct. PHAs consistently report that the same handful of minor items, dead alarms, missing outlet covers, and stray trip hazards, generate most reinspection work, according to NYCHA’s own guidance. Those aren’t hard problems. They’re neglected ones.
The bigger mistake landlords make is treating HQS and NSPIRE as interchangeable, assuming whatever checklist worked last year still applies. It might not. Confirm with your PHA which standard governs your unit before you prep, not after you fail. And don’t wait for a scheduled inspection to walk your own property. A quarterly self-check catches the smoke alarm nobody replaced and the leak that started three weeks ago, long before a failed inspection turns into a paused subsidy check.
— Main
Get Your Units Section 8 Ready Without Doing It Yourself
Running this checklist on every unit, every turnover, and every periodic inspection cycle is a full-time job on top of everything else landlords juggle, and that’s exactly the gap 2ndstreetpropertymanagement fills for owners across Southern New Jersey and the surrounding region. Instead of building your own inspection calendar and chasing repairs across multiple properties, 2ndstreetpropertymanagement handles pre-inspection prep, coordinates the repair work through vetted vendors, and manages the Section 8 paperwork and PHA communication directly.

That means fewer failed inspections, fewer paused subsidy payments, and one less system for you to track across your portfolio. If you own Section 8 units, or you’re considering adding voucher tenants to your portfolio, get in touch through the 2nd Street Property Management landing page to discuss your properties and how a managed inspection prep process would fit your specific units.
Sources
Recommended
Comments